

Remote control connection manual
One way to lock and unlock the e-Charger is through a remote control. Below, we show you the steps to enable remote control so you can conveniently manage the charger and control the charging from a distance.
Steps for connecting and installing the remote control
1. Access the power board
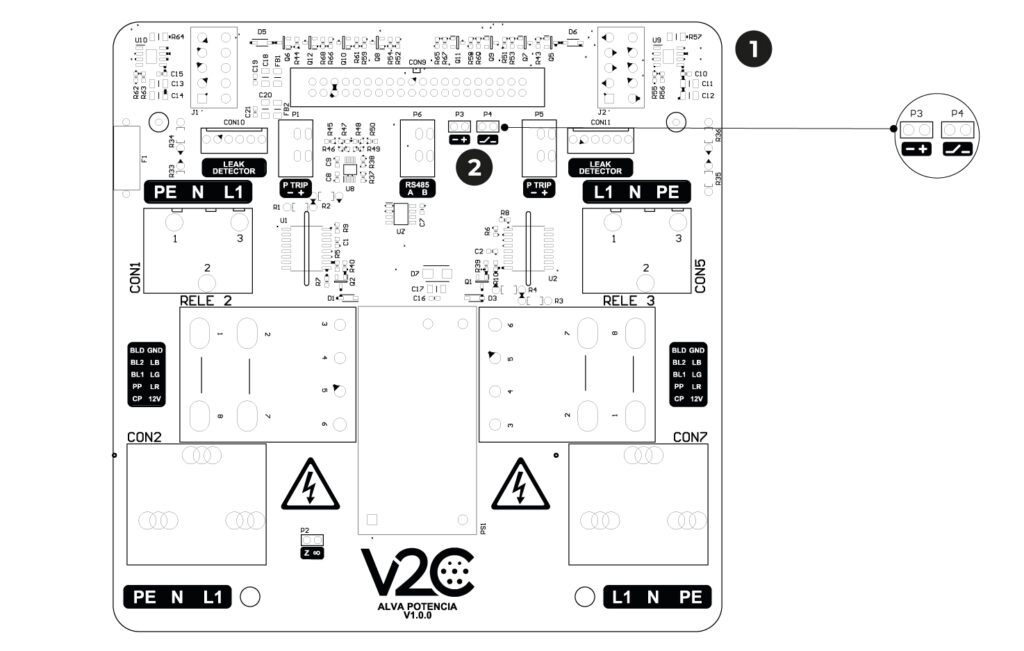
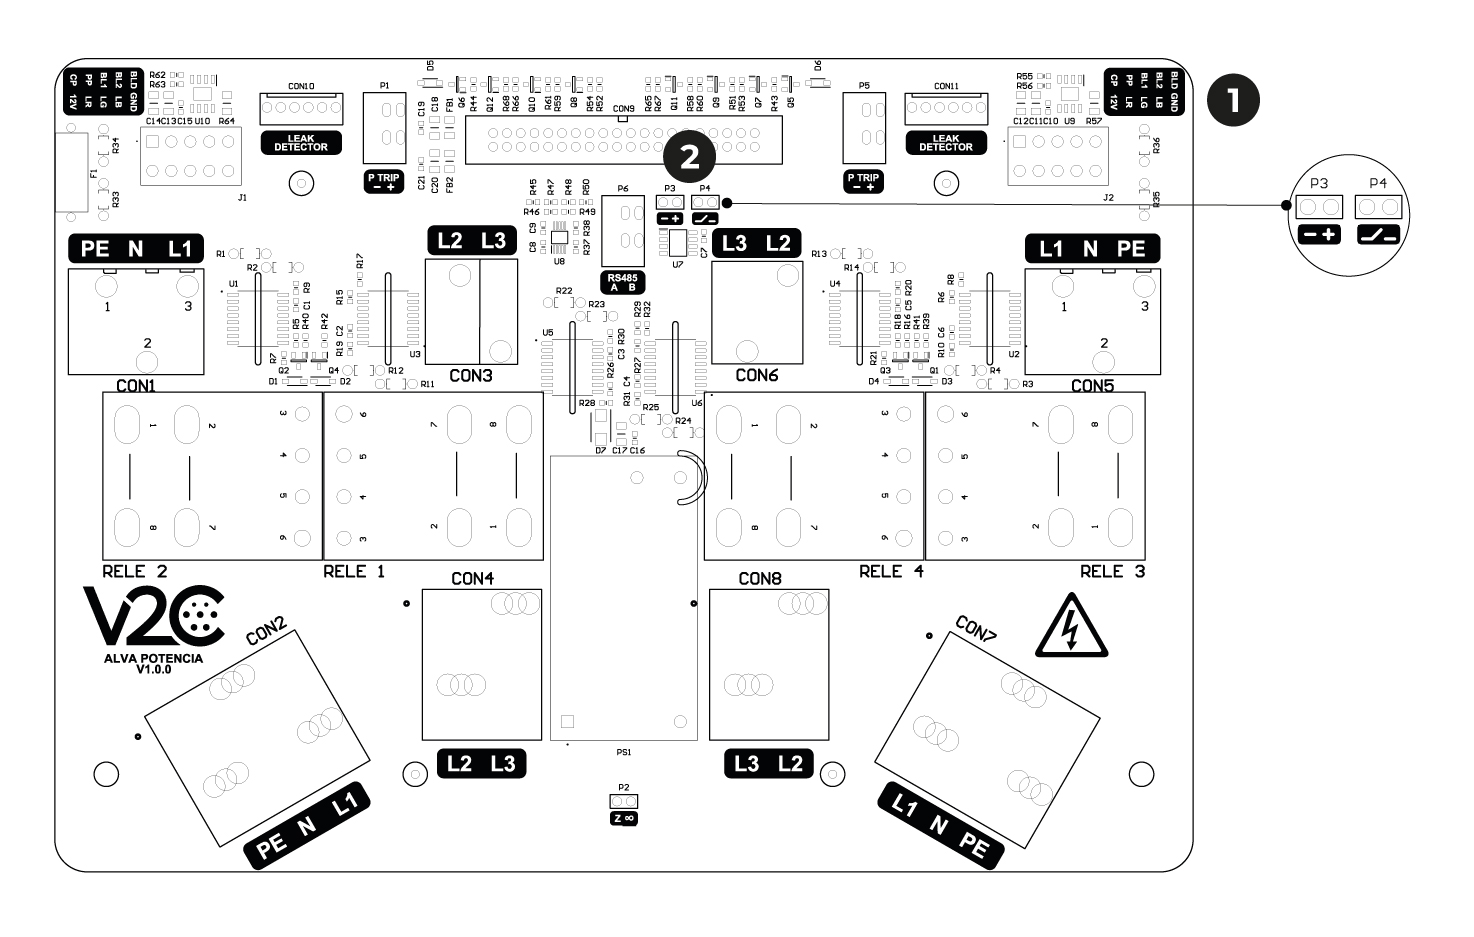
Access the inside of the charger and locate the P3 and P4 ports on the power board. If either of them has a jumper installed, you must remove it in order to connect the cables.
Single-phase power board
Three-phase power board

Power plate

Ports P3 and P4. Each port has two pins.
2. Connect the control board
Next, you need to connect the control board (receiver module) to the power board of Alva. The receiver module consists of five 5 ports: NC, COM, NO, +VCC, -GND. Secure the connection following the diagram below:
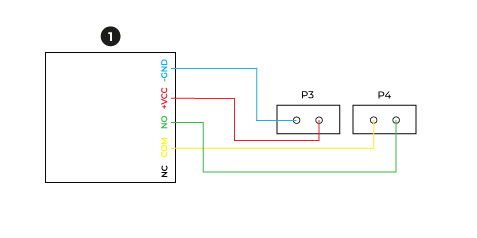
Back of the reception module
3. Set up the remote control
To link a remote:
– Press the white button located at the bottom corner of the receiver module (inside the protective box) 3 times.
– A red light will turn on indicating that the module is in “pairing mode”.
– On the remote, press the sequence: UNLOCKED – LOCKED – UNLOCKED.
– The charger will turn on. To turn it off, press the LOCKED button on the remote.
– If you want to add another remote, repeat step 1.
To remove all controls or reset the module:
– Press the white button in the bottom corner of the receiving module 8 times.
– The red light will blink; wait for it to turn off to complete the reset process.
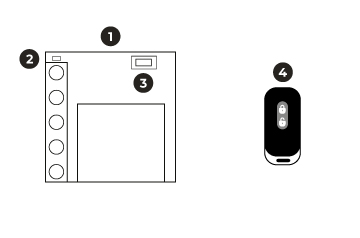
Front reception module
Programmable LED light

Programming button

Connection control
NOTE: If you are having trouble with the pairing, check the connection and reset the module.
Do you need technical support?
Resolve your issue instantly through our AI Chat. If it is not resolved, generate a request in the Technical Support Center and we will contact you as soon as possible to provide you with the best solution.