
Integration of Trydan with Home Assistant
Home Assistant, one of the most popular and versatile home automation platforms, allows you to efficiently control and monitor multiple smart devices. Among the various integrations it offers, the e-Charger Trydan stands out.
Home Assistant not only lets you monitor the real-time charging status of your electric vehicle, but also allows you to schedule charging intelligently, pause charging, adjust the intensity, and lock the charger, among other controls.
With the Trydan integration, you can receive customized notifications, access detailed energy consumption reports, and even integrate the charging process with other home devices, such as solar panels or energy storage systems.
Below, we’ll show you the steps to integrate Home Assistant.
IMPORTANT NOTE: First of all, you need to install Home Assistant on a Raspberry Pi.
How to integrate Home Assistant?
After installing Home Assistant on a Raspberry Pi, you can proceed with the integration. This can be done through two community-developed versions:
Version 1
To integrate this version, follow these steps:
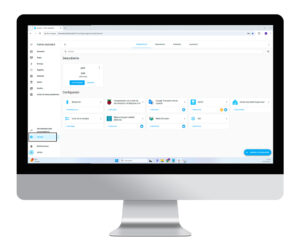
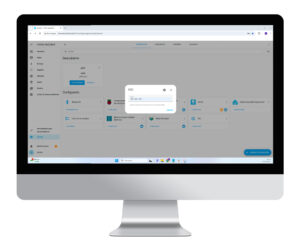
1. Go to the ‘Settings‘ section from the menu on the left.
2. Navigate to the ‘Devices & Services‘ section.
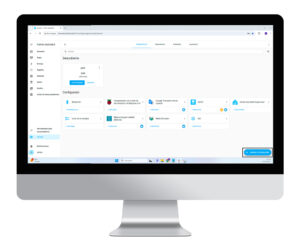
3. Select the ‘Add Integration‘ button at the bottom left.
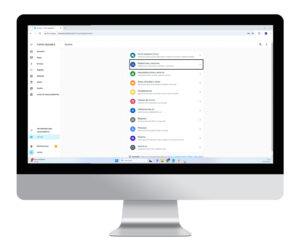
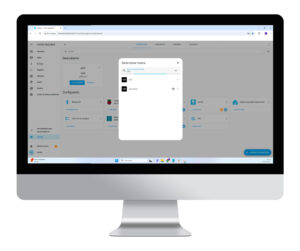
4. Search for V2C and select the arrow.
5. Add the IP address. To find the IP, open the V2C Cloud app, select the e-Charger, choose the settings icon, and then click the ‘WiFi Configuration‘ button.
Version 2
This version uses HACS, an extension for Home Assistant that allows users to easily access, install, and manage custom integrations, themes, cards, and other community-developed add-ons.
Please note that if you’re unsure which type of Home Assistant you are using or how to find that information, it’s better not to use HACS and instead complete the Home Assistant integration using Version 1.
If you have the necessary information, follow the steps below:
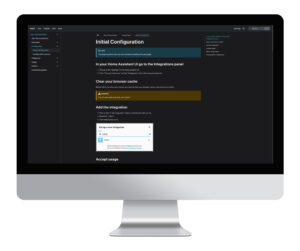
1. First, install ‘HACS’. Once finished, restart Home Assistant.
2. Configure ‘HACS’. Go to the integrations panel, then clear your browser cache, and then add the integration. Accept the terms of use and register the device.
3. Integrate V2C Trydan. To do this, you need to add the repository provided in the link to HACS.

Do you need technical support?
Resolve your issue instantly through our AI Chat. If it is not resolved, submit a request via the Technical Support Centre and we will contact you as soon as possible to provide the best solution.