
SAJ solar inverter integration with Trydan
If you want to know how to integrate your SAJ solar inverter with Trydan, you’re in the right place. Below is a guide to help you carry out this integration optimally.
The first step is to ensure that your inverter model is compatible with our Trydan charger. Once this compatibility is confirmed, follow these steps to successfully integrate your SAJ inverter, whether it’s the hybrid model with a battery or without, with our e-Charger and enjoy efficient and sustainable charging for your electric vehicle.
Integration of SAJ Solar Inverter without battery with Trydan
To connect the SAJ solar inverter without a battery, there are two different methods available:
In both cases, the e-Charger will operate with all charging modes, including solar energy. However, it is important to note that if a WiFi connection between the inverter and the charger is not established, the latter will not be able to carry out measurements of the photovoltaic energy.
Wired connection with the inverter installation energy meter
To establish the connection, it is necessary to extend a cable from Trydan to the main installation panel, where the SAJ inverter meter will be located. Although two cables will suffice, using a UTP cable can simplify both the installation and the connection to the Trydan charging point.
The connection to the Trydan charging point follows this scheme:
Pin 4 of the Trydan RJ-45 connector connects to terminal 25 (B-), while pin 5 of the same connector joins terminal 24 (A+) of the RS485 meter. It is important to remember that two cables will already be connected to the inverter.

NOTE: It is important that the loose UTP wires are isolated (properly crimped) and do not make contact with each other.
Direct WiFi connection with the inverter
For the correct functioning of dynamic power control, it is essential that both the e-Charger and the inverter are connected to the same WiFi network.
Next, identify the IP of the inverter to be connected. There are three methods to do this: through the router, using an IP scanner, or enabling a local WiFi network on the inverter.
Configuration of SAJ Inverter without Battery in V2C Cloud
To pair the charging point, enter the V2C Cloud application, select the e-Charger, and navigate to the ‘settings’ menu.
Click on the dynamic power control section, select ‘inverter’ as the device type, and ‘SAJ’ as the inverter type.
Finally, click ‘save’ to activate the configuration. After this, the device will restart automatically and will be ready to receive data on household consumption.
It is not necessary to configure an IP address on this device, but it provides a more complete user experience by allowing access to additional data on solar production/batteries through the V2C application. To do this, we can find the IP of devices connected to our local network. It is recommended to assign a fixed IP address in the router to avoid the need for subsequent changes.

Integration of SAJ Hybrid Solar Inverter with batteries with Trydan
To establish a wireless connection with the inverter, follow these steps:
To correctly integrate the SAJ hybrid inverter, it is essential to have the eSolar AIO3 dongle.
Connect the eSolar AIO3 dongle to the 4G/GPRS/WiFi port of the inverter.


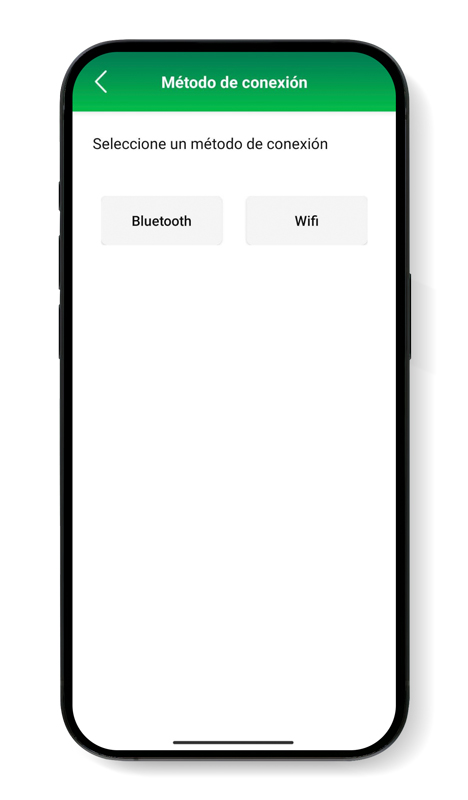
With the inverter on and the dongle correctly connected, open the GH-Style application and select ‘local connection’. Use the password ‘123456’ to access. The application will offer two connection options: Bluetooth or WiFi. Select the ‘WiFi’ connection.
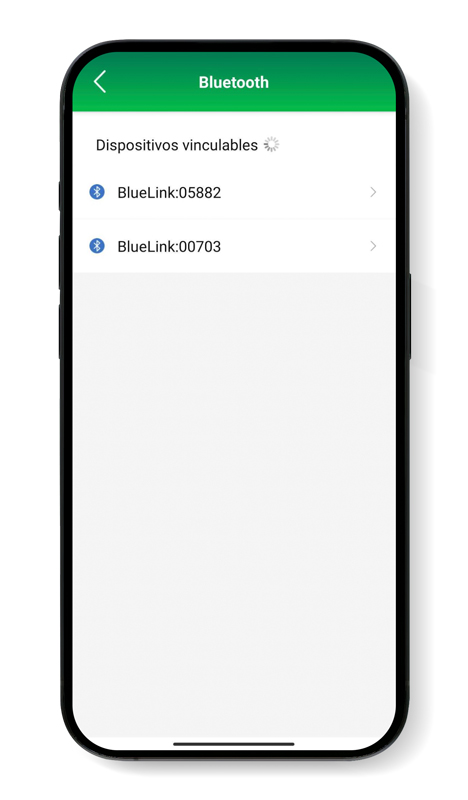
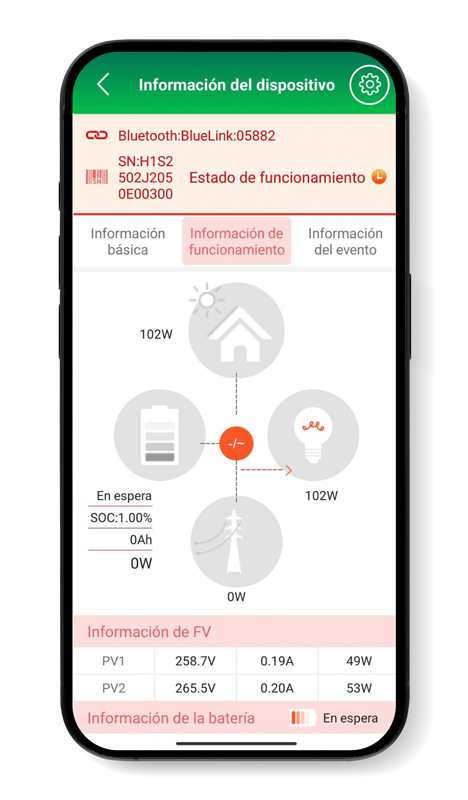
On the next screen, a list of available Bluetooth devices to connect will be displayed. Choose the device listed as ‘BlueLink:XXXXX‘, where the last five numbers are the Serial Number of the Dongle (SN), found on the back of the Dongle.
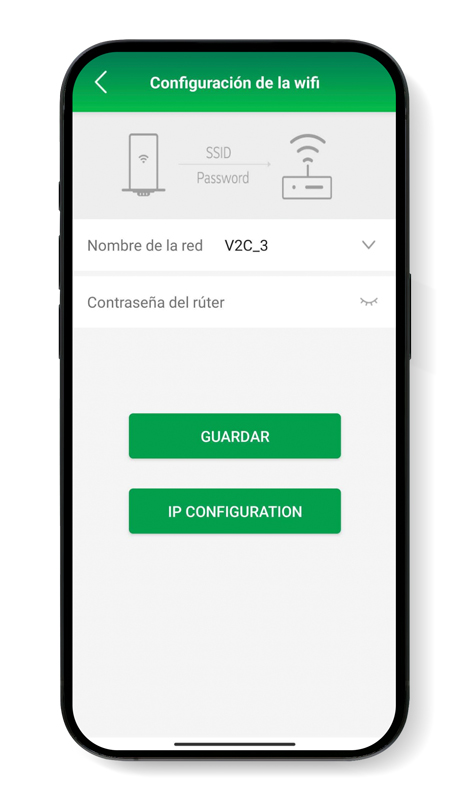
If this is the first time you are connecting, you will receive a message asking you to select the Internet access mode (WiFi or Ethernet). Select ‘WiFi’ and, on the next screen, enter the WiFi network and password you want the device to connect to. Make sure it matches the network to which the e-Charger is connected.
Once the changes are saved, or if this is not the first time you are connecting, you will return to the main screen, where the linked devices (Dongle and inverter) will be displayed.
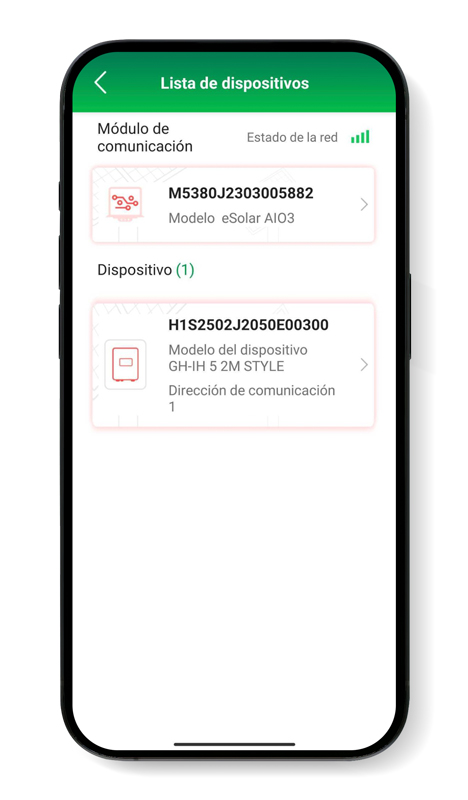
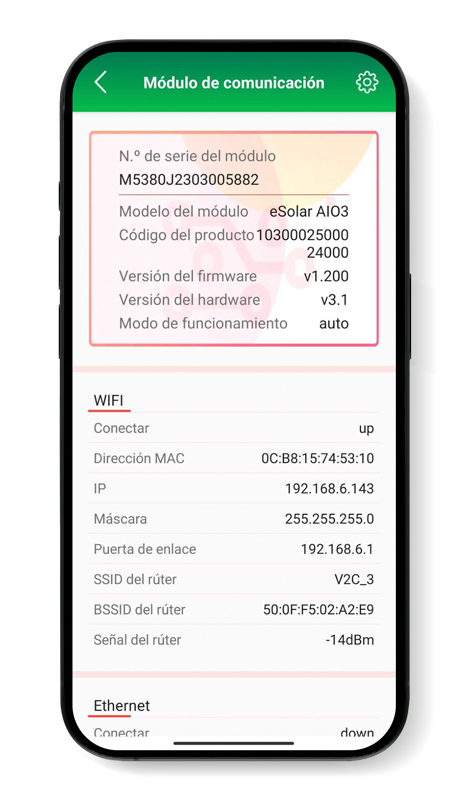
Next, choose the communication module (Sdongle). You will see ‘link up’ or ‘connect up’ if the connection has been successfully established, along with the IP of the Sdongle. This IP will be needed later during the dynamic power control configuration in the V2C Cloud application.
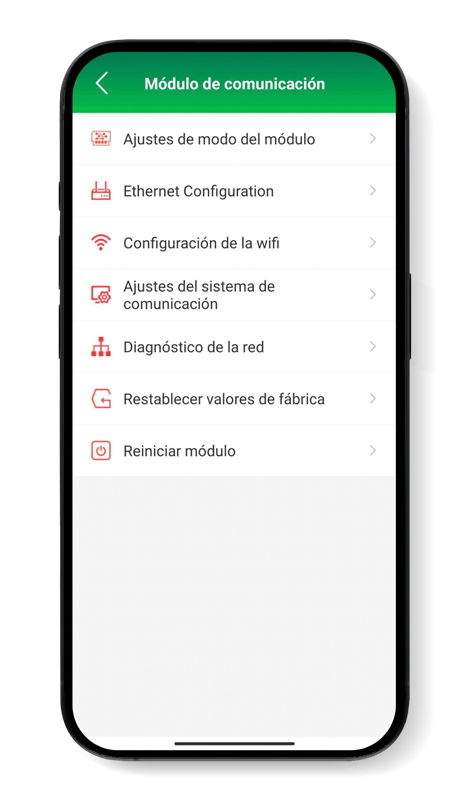
If you need to modify the WiFi network data, select the communication module and then tap the settings icon in the upper right corner of the next screen. Within the settings, select ‘WiFi configuration’ to choose the desired WiFi network.
* The Dongle version must correspond with v1.200.
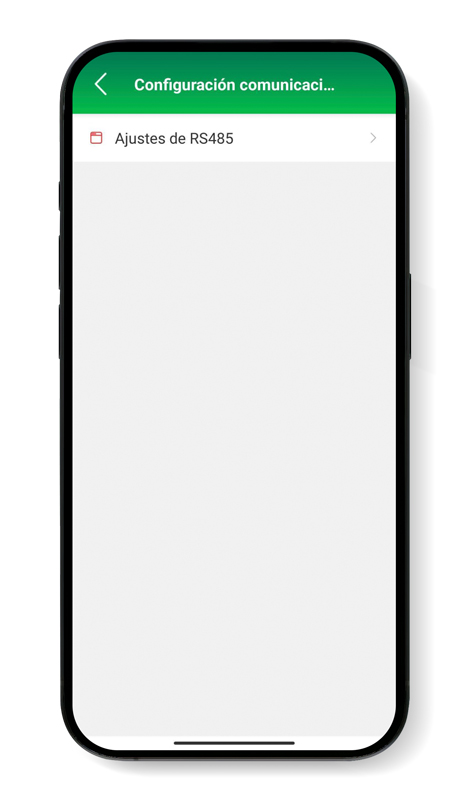
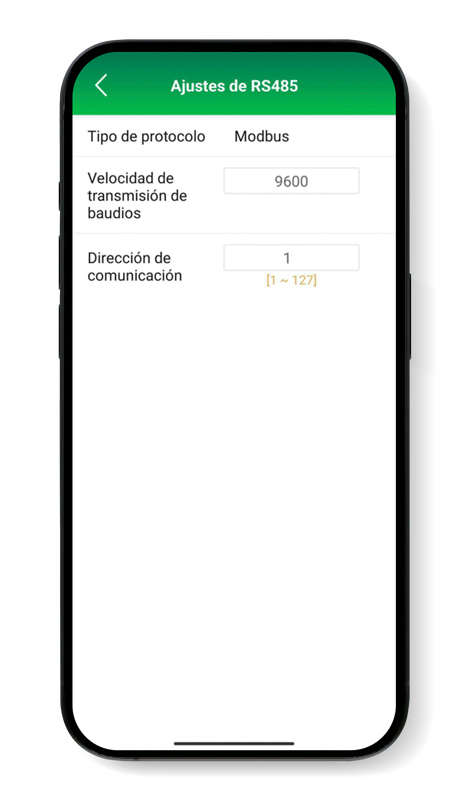
After configuring the inverter’s communication module, it is necessary to adjust the inverter’s own settings. To do this, access the device and go to the settings section (located in the upper right corner). Then, select ‘communication settings’, ‘RS485 settings’ and set the protocol type to ‘Modbus’, the baud rate to ‘9600’, and the communication address to ‘1’.

Configuration of SAJ Hybrid Inverter with batteries in V2C Cloud
To link the e-Charger, access the V2C Cloud application and select the device.
In the configuration section, click on dynamic power control, choose ‘inverter’ as the device type, and ‘SAJ’ as the inverter type.
Enter the IP address of the Sdongle device and select ‘SAJ with batteries’ and the type of installation. Save the configuration and the device will restart to receive consumption data.

Do you need technical support?
Generate a request in the Technical Support Centre and we will contact you as soon as possible to offer you the best solution.